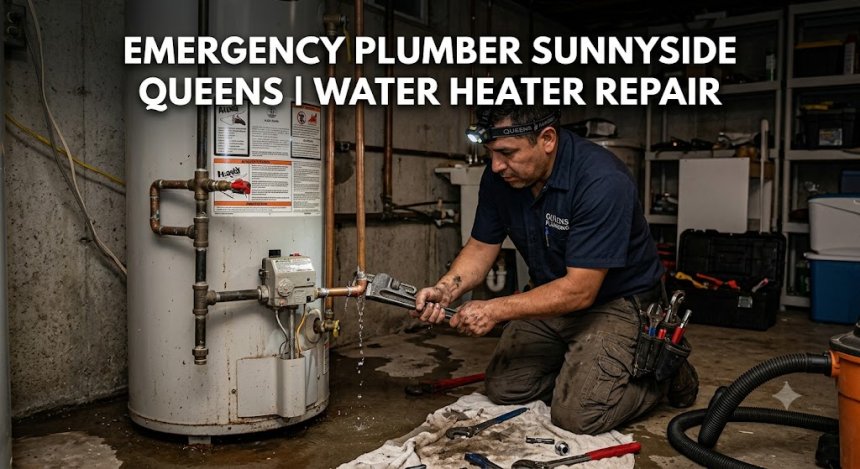
Emergency Plumber Sunnyside Queens | Water Heater Repair
Water heater failed in Sunnyside, Queens? Learn emergency steps, repair costs, causes, and when to call a local licensed plumber immediately.
Emergency Plumber in Sunnyside, Queens: What to Do When Your Water Heater Fails
It is early morning in Sunnyside, Queens. You step into the shower expecting a warm stream of water, but instead, you are hit with a freezing spray. Or worse, you walk down into your basement or open your utility closet only to find an inch of standing water creeping across the floor around your hot water tank.
A sudden water heater failure is one of the most frustrating and potentially destructive emergencies a homeowner, landlord, or business owner in Queens can face. Beyond the obvious loss of comfort, a leaking or ruptured hot water tank can quickly cause severe structural damage, ruin flooring, breed toxic mold, and run up massive water bills.
When your water heater quits or starts spilling gallons of water per minute, knowing how to react in the first fifteen minutes can mean the difference between a simple valve replacement and thousands of dollars in water damage restoration. This guide walks you through every critical step—from safe temporary shutoff procedures to understanding repair costs, technical causes, and how to choose a trustworthy local plumber in Sunnyside.
What Is a Water Heater Emergency?
A water heater emergency occurs whenever your domestic hot water system stops functioning in a way that poses an immediate risk to your property, safety, or health. While a minor dripping faucet can usually wait a day or two for a routine service call, a critical failure demands immediate intervention.
       ┌────────────────────────────────────────────────────────┐
       │             WATER HEATER EMERGENCY CHECK               │
       └────────────────────────────────────────────────────────┘
                                   │
              ┌────────────────────┴────────────────────┐
              ▼                                         ▼
      [ PHYSICAL DAMAGE ]                       [ SAFETY HAZARDS ]
   • Major active tank leaks                 • Gas odor around heater
   • Ruptured supply lines                   • Scorched control valves
   • Standing basement water                 • Popping/banging noises
   • Discolored/rusty water                  • Tripped circuit breakers
              │                                         │
              └────────────────────┬────────────────────┘
                                   │
                                   ▼
                       CALL EMERGENCY PLUMBER
Common emergency scenarios include:
-
Ruptured or Leaking Tanks: Water pooling rapidly around the base of the unit, signaling an internal tank fracture.
-
Complete Loss of Hot Water: Essential for sanitization, cooking, and daily hygiene in households and commercial establishments.
-
Gas Leaks or Burning Smells: Gas-fired water heaters that emit a rotten-egg odor (mercaptan) or display scorching around the burner assembly.
-
Popping or Rumbling Noises: High pressure build-up or severe sediment accumulation causing explosive steam bubbles within the unit.
-
Scalding Water Temperatures: A malfunctioning thermostat or stuck Temperature and Pressure Relief (TPR) valve allowing water to reach dangerously high temperatures.
In high-density residential areas like Sunnyside—where many homes are historic multi-family row houses, attached townhomes, or pre-war apartment buildings—water leaking from a top-floor or basement utility room can quickly seep into neighboring units, compounding liability and repair expenses.
Why Does Water Heater Failure Happen in Sunnyside, Queens?
Water heaters rarely fail without reason. A combination of regional water quality, system age, and mechanical wear contributes to sudden breakdowns.
1. Sediment Accumulation (Hard Water)
New York City is famous for its tap water quality, but mineral deposits still accumulate over time. Mineral sediment settles at the bottom of the tank. In gas units, this sediment acts as an insulating barrier, forcing the burner to overheat the bottom metal plate, which weakens the tank structure. In electric units, sediment buries the lower heating element, causing it to burn out prematurely.
2. Anode Rod Depletion
Every tank-style water heater contains a sacrificial anode rod—a metal rod made of magnesium or aluminum wrapped around a steel core wire. This rod attracts corrosive elements in the water so the steel tank does not rust. Once the anode rod is fully consumed (typically within 3 to 5 years), corrosive elements begin attacking the tank walls, leading to pinhole leaks or catastrophic rust-through ruptures.
3. Thermal Expansion and High Water Pressure
Municipal water lines deliver water under pressure. When cold water enters your tank and heats up, it expands. If your plumbing system is a closed loop (often caused by check valves or pressure-reducing valves), this expanded volume has nowhere to go. Without a working thermal expansion tank, repeated spikes in internal pressure stretch metal components, wear out internal linings, and rupture supply lines.
4. Excessive System Age
Most traditional tank water heaters have an average operational lifespan of 8 to 12 years. Tankless water heaters generally last 15 to 20 years with proper maintenance. Once a system passes its intended lifespan, metal fatigue, thermal cycling, and corrosion make failure inevitable.
5. Corroded Supply Lines and Valves
The flexible copper, brass, or braided stainless steel lines connecting your home's plumbing to the water heater degrade over time. Electrolysis (a reaction between dissimilar metals) can weaken joints, causing supply lines to snap or shutoff valves to freeze in place.
Warning Signs You Should Never Ignore
Your hot water system usually gives subtle warnings before complete failure occurs. Recognizing these early signs can save you from an emergency late at night.
| Warning Sign | Potential Underlying Issue | Urgency Level |
| Rusty or Discolored Hot Water | Internal tank corrosion or decaying anode rod | High: Tank failure is likely imminent |
| Rumbling, Popping, or Banging Noises | Excessive sediment buildup overheating the tank base | Moderate to High: Needs flushing or element check |
| Water Moisture Around the Tank Base | Minor leak in drain valve, TPR valve, or internal lining | High: Small leaks quickly become ruptures |
| Fluctuating Water Temperatures | Thermostat failure, failing heating element, or dip tube damage | Moderate: Requires electrical or sensor diagnosis |
| Low Hot Water Pressure | Mineral scale clogging supply lines or output nipples | Moderate: System descaling needed |
| Smell of Rotten Eggs near Gas Line | Gas line leak or dangerous pilot light malfunction | CRITICAL: Shut off gas and evacuate immediately |
Common Plumbing Problems Related to Water Heater Failures
A broken water heater often triggers secondary plumbing issues throughout your property:
-
Sump Pump Overload: When a water heater ruptures in a basement, groundwater sump pumps may struggle to clear the sudden deluge of hot water, leading to localized basement flooding.
-
Fixture and Aerator Clogging: Broken dip tubes (the plastic tubes that direct cold water to the bottom of the tank) can disintegrate into small white plastic fragments that travel through lines, clogging showerheads, faucet aerators, and mixing valves.
-
Main Line Drain Clogs: Heavy sediment flushed into house drains without adequate water flow can settle in lateral sewer lines, causing secondary drain backups.
-
Electrical Breaker Trips: A shorted heating element in an electric water heater will repeatedly trip the property’s main circuit breaker panel, cutting power to other essential appliances.
Immediate Action: What to Do When Your Water Heater Fails
If your water heater breaks or starts spilling water, follow these safety steps before your plumber arrives:
                  ┌───────────────────────────────┐
                  │   EMERGENCY SHUTDOWN STEPS    │
                  └───────────────┬───────────────┘
                                  │
      ┌───────────────────────────┼───────────────────────────┐
      ▼                           ▼                           ▼
[ 1. SHUT OFF WATER ]     [ 2. SHUT OFF POWER ]      [ 3. DRAIN THE TANK ]
Turn off top valve       Electric: Switch breaker   Attach garden hose
(or main supply)          Gas: Turn knob to PILOT    to bottom drain valve
-
Turn Off the Water Supply: Locate the cold water shutoff valve above the water heater (usually a lever or wheel). Turn it clockwise (or perpendicular to the pipe) to stop water from filling the tank. If that valve is frozen or leaking, shut off your property’s main water valve.
-
Cut the Power or Gas Source:
-
For Electric Units: Locate your main electrical breaker box and flip the dedicated double-pole breaker for the water heater to the "OFF" position.
-
For Gas Units: Rotate the gas control valve knob on the front of the heater to the "OFF" or "PILOT" setting. Shut off the gas line valve on the incoming pipe if accessible.
-
-
Relieve System Pressure: Open a hot water faucet on an upper floor of your home. This relieves vacuum pressure within the plumbing lines and helps water drain out faster from the leak source.
-
Safely Contain Spilled Water: Use mops, towels, wet/dry vacuums, or squeegees to clear standing water. Keep water away from electrical outlets, subfloors, and finished drywall.
-
Call a Licensed Emergency Plumber: Reach out to a local Queens plumbing company experienced in emergency water heater diagnostics and replacements.
Step-by-Step Professional Repair Process
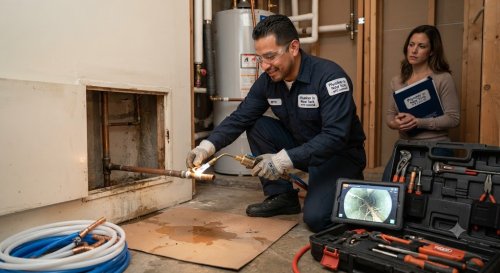
When a licensed plumber arrives at your Sunnyside property, they follow a methodical process to restore your hot water safely and bring your system up to current New York City plumbing codes.
┌─────────────────┐     ┌─────────────────┐     ┌─────────────────┐
│ 1. Inspection   │ ──► │ 2. Diagnosis    │ ──► │ 3. Quote        │
│    & Safety     │     │    & Testing    │     │    & Scope      │
└─────────────────┘     └─────────────────┘     └─────────────────┘
                                                         │
┌─────────────────┐     ┌─────────────────┐              ▼
│ 6. Final Test   │ ◄── │ 5. System Flush │ ◄── ┌─────────────────┐
│    & Cleanup    │     │    & Fill       │     │ 4. Repair or    │
└─────────────────┘     └─────────────────┘     │    Replacement  │
                                                └─────────────────┘
Step 1: Initial Inspection and Safety Assessment
The technician inspects the unit for structural hazards, active gas leaks, electrical shorts, or carbon monoxide concerns. They check the condition of venting pipes on gas units to ensure combustion gases are venting safely outdoors.
Step 2: System Diagnosis
Using diagnostic tools, the plumber tests thermostats, heating elements, thermocouples, gas control valves, and pressure valves. If the outer steel shell of the tank is split, repair is impossible, and an immediate replacement plan is prepared.
Step 3: Upfront Estimate and Scope of Work
The plumber provides a clear, written breakdown detailing whether a component repair or complete replacement is required. You receive options for traditional tank-style heaters or modern high-efficiency tankless models.
Step 4: System Isolation and Tank Draining
If replacing the unit, the plumber attaches a commercial hose to the drain valve, routing residual hot water and slurry safely down a floor drain or into a pump assembly.
Step 5: Removal and Installation
The old unit is disconnected from water, gas, or electrical lines and removed. The plumber installs the new unit, attaching code-compliant expansion tanks, new brass shutoff valves, flex connectors, and updated exhaust flue piping where required.
Step 6: Testing and Pressure Calibration
The system is filled, purged of trapped air, energized, and monitored for proper thermal rise. Water pressure is verified with a gauge to confirm it stays within safe operational limits (typically 40–60 PSI).
Step 7: Site Cleanup and Maintenance Briefing
The work area is thoroughly cleaned. The plumber guides you through the operation of your new heater, explaining proper thermostat settings, emergency shutoff points, and maintenance expectations.
Can You Fix It Yourself? (DIY vs. Professional Plumbing)
While home improvement shows make plumbing look simple, water heaters involve three high-risk elements simultaneously: water pressure, electricity/gas combustion, and high heat.
                       CAN YOU FIX IT YOURSELF?
                                   │
         ┌─────────────────────────┴─────────────────────────┐
         ▼                                                   ▼
  [ SAFE DIY TASKS ]                                 [ CALL A LICENSED PLUMBER ]
  • Checking pilot light                             • Replacing ruptured tanks
  • Resetting tripped breakers                       • Working on gas lines & valves
  • Flushing annual sediment                         • High-voltage electrical work
  • Replacing leaky drain valves                     • Installing thermal expansion tanks
  • Adjusting temperature dials                      • Upgrading exhaust vent stacks
When DIY Is Safe
-
Re-lighting a Gas Pilot Light: Following the manufacturer’s printed instructions on the lower panel.
-
Checking the Breaker: Resetting a tripped electrical breaker once (if it trips repeatedly, call a professional).
-
Adjusting Thermostat Settings: Lowering the temperature to 120°F (49°C) to prevent scalding and reduce energy costs.
-
Basic Flushing: Attaching a garden hose to drain a gallon or two of water annually to check for clarity.
When DIY Is Dangerous
-
Gas Line Work: Working on gas valves without proper licensing and leak-detection equipment creates grave fire, explosion, or carbon monoxide risks.
-
Main Electrical Wiring: 240-volt electrical connections on electric units can cause severe shock or fire if miswired.
-
Replacing Internal Tank Components on Old Units: Attempting to force rusted, calcified fittings can crack pipes inside subfloors, converting a minor drip into a major flood.
-
Code Compliance: New York City plumbing codes require proper backflow prevention, thermal expansion tanks, and specific chimney/vent clearances. DIY installations often fail municipal inspections or void home insurance policies.
Specialized Tools Professionals Use
Modern emergency plumbing relies on specialized diagnostic and installation gear to ensure long-term reliability:
-
Thermal Imaging Cameras: Detect hidden moisture inside walls, subfloors, and surrounding insulation without tearing down drywall.
-
Digital Manometers: Measure minute pressure differentials in gas supply lines to locate micro-leaks.
-
Water Pressure Gauges: Instantly measure peak pressure spikes from the municipal water main.
-
Combustion Analyzers: Measure carbon monoxide levels and flue exhaust temperatures in gas-fired water heaters to guarantee safe operation.
-
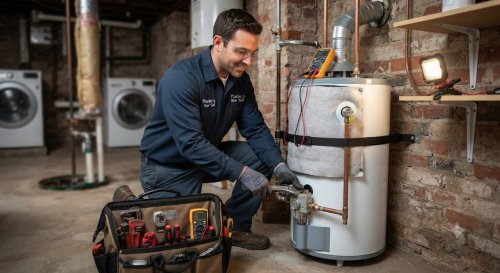
Electrical Multimeters: Test voltage continuity across heating elements, upper and lower thermostats, and high-limit safety switches.
-
Pipe Pressing Tools (ProPress): Allow plumbers to create watertight copper joints without using open torches inside tight basements or wooden frames.
How Long Does Water Heater Repair or Replacement Take?
Service duration varies based on whether your system requires a quick part replacement or a complete system overhaul:
[ Simple Component Repair ]   ██ 1 - 2 Hours
[ Complete Tank Replacement]  █████ 3 - 5 Hours
[ Tankless Conversion ]       █████████ 6 - 8+ Hours
-
Simple Repairs (1–2 Hours): Replacing a failed thermocouple, upper thermostat, heating element, or external drain valve.
-
Standard Tank Replacement (3–5 Hours): Draining, hauling away an old 40–80 gallon tank, positioning a new unit, updating water lines, installing an expansion tank, and setting up exhaust venting.
-
Tankless Upgrade / Conversion (6–8+ Hours): Converting from a standard tank to an on-demand tankless system. Requires running new gas supply lines, installing specialized venting out exterior walls, and re-routing water lines.
-
Factors Affecting Timeline: Restricted basement access, narrow pre-war staircases, corroded shutoff valves that break during isolation, or non-compliant flue pipes requiring immediate code upgrades.
Water Heater Repair and Replacement Cost Factors
Because every property's plumbing infrastructure is unique, reputable plumbers do not provide fixed phone quotes without diagnosing the setup first. Total costs depend on several core factors:
Key Cost Components
-
Diagnostic Fees: The time and labor required for a plumber to inspect, diagnose, and outline repair options.
-
Type of Repair vs. Replacement: Replacing a simple $30 thermocouple costs significantly less than installing a complete commercial-grade 80-gallon gas water heater.
-
Fuel Source (Gas vs. Electric): Gas units require rigid venting, specialized gas flex lines, and chimney checks, while electric units demand correct wire gauge sizes and dedicated breakers.
-
System Modifications: If your original setup lacks mandatory safety features (like a expansion tank, vacuum relief valve, or proper code discharge pipe on the TPR valve), adding these will adjust the overall project cost.
-
Emergency Service Timing: Service calls requested late at night, on weekends, or during severe winter weather conditions carry different labor rates than standard weekday appointments.
-
Accessibility Challenges: Low-clearance crawlspaces, tight closet spaces, or top-floor walk-ups require additional labor and safety precautions.
Industry Note: Plumbing repair and replacement costs vary depending on the severity of the problem, accessibility, materials required, emergency service timing, property type, and local labor rates in the New York metropolitan area.
Hidden Truths Homeowners Should Know
Understanding how plumbing systems operate in older neighborhoods like Sunnyside helps you avoid common pitfalls:
-
Small Leaks Cause Massive Hidden Damage: A tiny, pinhole leak dripping onto a wood subfloor can rot floor joists and breed toxic black mold long before water manifests through drywall downstairs.
-
Cheap Quick Fixes Usually Cost More Later: Patching a rusted water heater tank with epoxy or leak sealants never lasts. Structural tank rust under continuous high pressure will eventually blow through the temporary seal.
-
Insurance Companies Look for Neglect: Many homeowners insurance policies deny coverage for water damage claims if the water heater was past its reasonable lifespan and showed obvious long-term corrosion signs that were ignored.
-
Hard Water Silently Kills Systems: Untreated hard water drops overall system efficiency by up to 30% and cuts a standard water heater's operating life nearly in half.
-
A Dripping Pressure Relief Valve Is a Severe Warning: If the Temperature and Pressure Relief (TPR) valve on your tank is discharging water regularly, your system is either running dangerously hot or facing extreme pressure spikes.
-
Annual Flush Maintenance Pays for Itself: Flushing a water heater tank once a year restores heating efficiency, lowers monthly utility bills, and adds years of life to the internal lining.
15 Common Water Heater Mistakes Homeowners Make
-
Ignoring Minor Drips: Assuming a small puddle around the base of the tank is just normal condensation.
-
Setting the Temperature Too High: Running thermostats above 120°F (49°C) accelerates internal scale formation, increases energy usage, and poses scalding risks to children and seniors.
-
Storing Chemicals Near Gas Units: Storing paint, gasoline, cleaning chemicals, or aerosol cans near a gas water heater creates severe fire hazards due to open pilot lights.
-
Blocking Access to the Heater: Storing boxes, clutter, or furniture right against the unit, hindering emergency access and restricting combustion airflow.
-
Skipping Anode Rod Inspections: Never replacing the anode rod, allowing corrosive elements to eat away at the main steel tank.
-
Cranking the Thermostat to Fix a Burned Element: Turning up temperature controls when water feels warm instead of hot, which burns out remaining heating components.
-
Hiring Unlicensed Handymen: Allowing uninsured contractors to connect gas fittings or high-voltage wiring without proper permits or training.
-
Forgetting to Flush the Tank: Letting years of heavy mineral sediment build up until the bottom of the unit calcifies solid.
-
Disabling the TPR Relief Valve: Plugging or capping off a leaking Temperature and Pressure Relief valve. This converts your water heater into a dangerous pressure vessel.
-
Using the Wrong Pipe Materials: Connecting copper pipes directly to galvanized steel connections without dielectric unions, causing rapid galvanic corrosion.
-
Over-Tightening Threaded Fittings: Cracking brass, plastic, or copper connections during DIY repair attempts by over-torquing joints.
-
Leaving Thermal Expansion Tanks Unchecked: Ignoring an expansion tank with a ruptured internal bladder, leaving the main tank vulnerable to daily pressure spikes.
-
Ignoring Popping and Knocking Sounds: Treating loud operational noises as harmless quirks rather than signs of severe sediment overheating.
-
Delaying System Upgrades Until Complete Rupture: Waiting until the unit floods the basement before shopping for a replacement, forcing rushed, stress-filled choices.
-
Turning Off Water Without Turning Off Power/Gas: Draining a water heater without turning off the electricity or gas line causes electric elements to burn out in seconds ("dry firing") or gas burners to warp the tank floor.
Proactive Water Heater Maintenance Checklist
Regular preventative maintenance keeps your unit operating safely and efficiently.
       ┌───────────────────────────────────────────────────────┐
       │             ANNUAL MAINTENANCE CHECKLIST              │
       └───────────────────────────────────────────────────────┘
                                   │
      ┌────────────────────────────┼────────────────────────────┐
      ▼                            ▼                            ▼
[ MONTHLY CHECK ]           [ BI-ANNUAL CHECK ]           [ ANNUAL CHECK ]
• Clear area around tank    • Test TPR valve lever       • Complete tank flush
• Check floor for leaks     • Check exhaust flue         • Inspect anode rod
• Check pilot flame color   • Test expansion tank        • Inspect electrical joints
Seasonal & Periodic Routine Steps
-
Clear the Surrounding Area: Keep at least 2 feet of open clearance around your water heater at all times for safe combustion airflow and easy inspection access.
-
Test the TPR Valve (Bi-Annually): Gently lift the lever on the Temperature and Pressure Relief valve. It should discharge a burst of hot water into the discharge pipe. If it fails to discharge or won't stop dripping afterward, have it replaced.
-
Check the Anode Rod (Every 2–3 Years): Remove the anode rod located on top of the tank. If it is coated in thick scale or worn down to its inner wire core, thread in a new one immediately.
-
Perform an Annual Tank Flush: Attach a garden hose to the bottom drain valve, open the drain, and flush out accumulated sediment slurry until the discharged water runs clear.
-
Inspect Gas Venting Stacks: Inspect metal flue pipes above gas units for signs of rust, disconnects, or soot buildup that could leak carbon monoxide into your living quarters.
-
Verify System Water Pressure: Keep a simple pressure gauge connected to an outdoor hose spigot or laundry tub valve. If household water pressure consistently exceeds 80 PSI, have a pressure-reducing valve (PRV) installed on your main line.
When Should You Call an Emergency Plumber?
Not every plumbing issue warrants an emergency weekend rate, but certain critical situations require immediate professional intervention:
-
Active, Uncontrollable Leaks: Water flowing out of the main unit or broken supply valves that cannot be isolated using local shutoff handles.
-
Smell of Gas or Rotten Eggs: Indicates an active gas supply line leak near your water heater.
-
Electrical Burning Odors or Sparks: Visible scorching around heating element access panels or wire connections on electric units.
-
Complete Loss of Water Pressure Across the House: Signals a major ruptured main line or severe inline blockage.
-
Sewage Backups in the Utility Area: Wastewater backing up through floor drains adjacent to your water heating equipment.
If you encounter any of these scenarios, turn off your main utility supply shutoffs if safe to do so, evacuate the immediate space if gas is present, and contact an emergency plumber immediately.
Frequently Asked Questions
Why is my water heater making a loud popping or rumbling noise?
Loud popping or rumbling sounds indicate heavy sediment accumulation at the bottom of the tank. Water becomes trapped beneath this mineral layer, boils, and bursts through the sediment crust like steam bubbles. Flushing the tank often solves the issue, though heavy buildup may require professional descaling or unit replacement.
How long do traditional water heaters last?
Tank-style gas or electric water heaters typically last between 8 and 12 years. Tankless water heaters can last 15 to 20 years or longer with regular yearly maintenance and hard water management.
Can a faulty water heater increase my energy and water bills?
Yes. Mineral sediment acts as an insulator, forcing your heating elements or gas burners to run much longer to heat the same volume of water. Furthermore, slow leaks or a stuck TPR valve can waste hundreds of gallons of water per month.
Why does my hot water smell like rotten eggs?
A sulfur or rotten egg smell in your hot water is usually caused by anaerobic bacteria inside the tank reacting with the magnesium anode rod, creating hydrogen sulfide gas. A licensed plumber can disinfect the tank and swap the magnesium rod for a zinc or powered anode rod.
What causes a water heater tank to burst suddenly?
Tank bursts are usually caused by long-term internal corrosion, severe pressure spikes combined with a broken thermal expansion tank, or a stuck Temperature and Pressure Relief (TPR) valve that fails to release dangerous internal pressure.
Is it better to repair or replace an old water heater?
If your water heater is under 8 years old and suffers from a minor component issue (like a broken thermostat or bad heating element), repair is typically the most cost-effective choice. If the unit is over 10 years old, leaking from the main tank, or heavily rusted, replacing it with a modern, energy-efficient model is wiser long-term.
What is the purpose of a thermal expansion tank?
When cold water is heated, it expands in volume. A thermal expansion tank absorbs this extra water volume and relieves excess pressure inside your plumbing system. Without one, daily pressure spikes strain pipe joints, supply lines, and internal tank seals.
Can I convert my standard tank water heater to a tankless system?
Yes. Converting to a tankless system provides continuous on-demand hot water and frees up floor space. However, it requires proper system sizing, retrofitting specialized gas or electrical lines, and installing proper exterior venting stacks.
What temperature should my water heater be set to?
The Occupational Safety and Health Administration (OSHA) and most plumbing professionals recommend setting your water heater thermostat to 120°F (49°C). This temperature balances energy efficiency, prevents scalding accidents, and inhibits bacterial growth like Legionella.
How do I know if my water heater failure is covered by homeowner's insurance?
Insurance coverage generally depends on the root cause of the breakdown. Sudden, unexpected ruptures that cause interior water damage are often covered. However, damage caused by long-term, unaddressed leaks, lack of basic maintenance, or simple wear-and-tear on an outdated unit is typically excluded.
Why Choose Plumber in New York City?
When a water heater emergency hits your Sunnyside home or commercial property, you need a responsive, highly qualified plumbing team that understands local building requirements.
At Plumber in New York City, we prioritize your family's safety, comfort, and property protection:
-
Licensed & Insured Professionals: Our team consists of master plumbers with deep hands-on expertise in diagnosing, repairing, and replacing all major tank and tankless water heating brands.
-
Upfront Pricing: We provide clear diagnostic evaluations and upfront, transparent estimates before any work begins—no surprise fees or hidden surcharges.
-
Fast Local Response: Operating directly within New York City, our equipped service vans arrive stocked with common replacement parts, valves, and diagnostic tools to handle emergencies promptly.
-
Full Building Code Compliance: Every replacement we complete adheres strictly to New York City plumbing codes, including safety expansion tanks, vacuum valves, and certified flue venting setups.
-
Comprehensive Service Guarantee: We stand behind our workmanship, giving you peace of mind that your home's hot water system is reliable, efficient, and safe.