Emergency Plumber Long Island City: Major Water Leaks
Active water leak in Long Island City? Learn shut-off steps, causes, repair costs, and when to call a licensed emergency plumber in LIC, Queens
Emergency Plumber in Long Island City: What to Do About a Major Water Leak
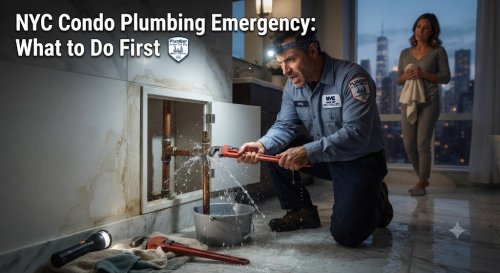
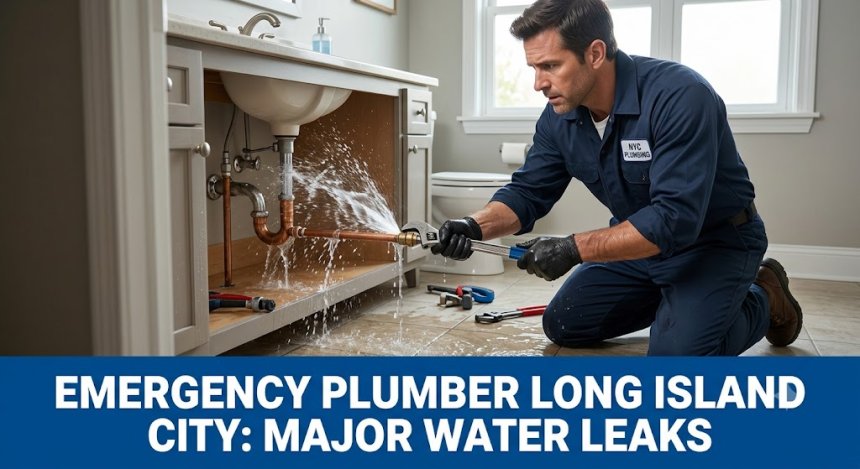
A sudden, major water leak is every property owner's worst nightmare. In Long Island City (LIC)—where sleek high-rise luxury towers, repurposed historic industrial warehouses, and classic pre-war brick multi-family homes share the skyline along the East River—water line failures can escalate within minutes. Whether it is a burst copper pipe behind drywall in Hunters Point, a ruptured water heater line near Vernon Boulevard, or a main supply pipe rupture in a Queens Plaza commercial unit, uncontrolled water rapidly destroys floors, ruins ceiling plaster, shortens the lifespan of structural supports, and creates immediate electrical hazards.
Property owners and building managers frequently search for emergency leak guidance when water begins pouring through ceilings or pooling on subfloors. Knowing how to locate your main shut-off valve, taking immediate containment measures, and calling a licensed emergency plumber can mean the difference between a minor repair bill and tens of thousands of dollars in structural restoration.
What Is a Major Water Leak Emergency?
A major water leak emergency occurs when a pressurized water supply line, main service line, or primary plumbing fixture fails catastrophically, discharging high volumes of water into living spaces, utility areas, or wall cavities.
Unlike a minor, slow-drip faucet, pressurized water leaks actively flood surrounding materials. Because NYC plumbing systems operate under significant water pressure to reach upper floors, an uncontained line breach can dump dozens of gallons per minute into a building.
Common Real-World Situations in Long Island City
-
High-Rise Riser Line Failures: A pressurized copper riser pipe in a Hunters Point condo building pinholes, causing water to cascade down through multiple lower units.
-
Winter Freeze Fractures in Converting Warehouses: Unheated spaces or outer wall pipes in converted commercial lofts freeze during winter cold snaps, splitting open once temperatures rise.
-
Flex Hose Ruptures Under Sinks: Synthetic braided supply lines under kitchen sinks or washing machines snap under continuous water pressure, flooding wood subfloors while occupants are away.
Why Does This Plumbing Problem Happen?
Major water leaks in Long Island City happen due to a combination of environmental factors, building age, and high municipal water pressure:
-
High Water Pressure: Municipal supply pressure in urban zones can fluctuate or exceed 80 PSI. Without a working Pressure Reducing Valve (PRV), constant pressure weakens pipe joints and flex lines.
-
Corrosion and Age: Older galvanised steel or copper pipes develop internal corrosion, wall thinning, and pinhole leaks over decades of continuous use.
-
Seasonal Freezing and Thawing: Winter temperatures in NYC freeze stagnant water inside uninsulated pipes. Expanding ice creates pressure spikes that split metal and plastic lines.
-
Water Hammer Stress: Sudden pressure surges caused by fast-closing solenoid valves (in dishwashers and washing machines) shock pipes, loosening solder joints over time.
-
Improper Installation: Mismatched pipe metals (causing galvanic corrosion), over-tightened threaded fittings, or poorly soldered joints fail under stress.
-
Hard Water Scale Accumulation: Mineral buildup restricts pipe interiors, increasing localized internal pressure and weakening valve seals.
Signs You Should Never Ignore
Active gushes are easy to spot, but subtle warning signs often precede a catastrophic water line failure:
-
Unexplained Spikes in Water Bills: A sudden increase in utility costs without extra usage indicates water leaking from pressurized pipes underground or behind walls.
-
Warm or Damp Spots on Flooring: Unexplained warm patches on concrete or wood floors often point to hot water line pinholes or slab leaks.
-
Sound of Running Water When Fixtures Are Off: Hearing a continuous rushing or hissing noise near walls or utility closets when no taps are running.
-
Bubbling Paint or Sagging Ceiling Drywall: Moisture accumulating behind wallboard causes paint to blister and ceilings to bow downward.
-
Sudden Drop in Water Pressure: A sharp drop in overall fixture pressure signals that water is escaping through a major breach elsewhere in the supply network.
-
Musty Odors and Damp Walls: Persistent dampness and dark mildew spots along baseboards indicate long-term hidden leaks.
Common Plumbing Problems Related to This Issue
A major water leak rarely stays localized; it triggers a chain reaction of secondary plumbing and structural problems:
-
Electrical Hazards and Short Circuits: Water leaking through ceiling cavities into light fixtures, junction boxes, or outlet conduits creates immediate fire and shock risks.
-
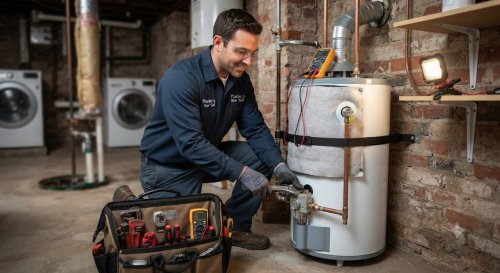
Water Heater Tank Breaches: Corroded storage tanks suddenly rupture at the base, releasing up to 50 gallons of heated water instantly.
-
Slab and Foundation Erosion: Leaks in underground main service lines erode supporting soil, causing concrete basement slabs to crack or sink.
-
Subfloor and Flooring Delamination: Hardwood floors buckle, laminate swells, and subfloor plywood rots when exposed to standing water.
Step-by-Step Professional Repair Process
When a licensed emergency plumber arrives at your Long Island City property, they follow a systematic process to isolate, repair, and verify your water line:
Step 1: Emergency Shut-Off & Containment
The technician immediately locates and closes the main water shut-off valve or local isolation valves to halt active flooding, then relieves remaining line pressure.
Step 2: Advanced Leak Location & Diagnostic
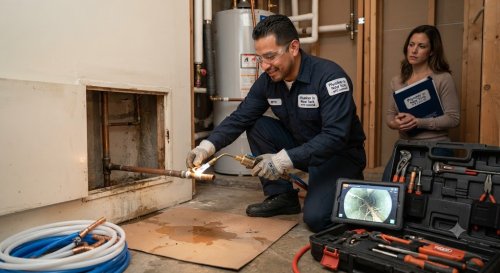
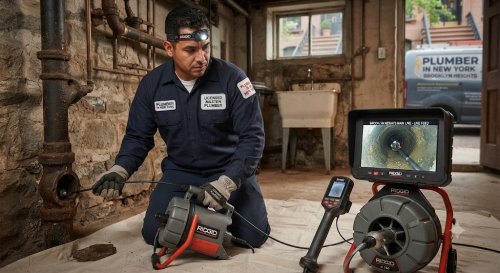
Using non-invasive acoustic leak detectors, pressure gauges, and thermal imaging cameras, the plumber pinpoints the exact point of pipe failure without tearing down unnecessary drywall.
Step 3: Upfront Repair Estimate
The plumber explains the root cause, outlines whether a localized section replacement or broader pipe repiping is necessary, and provides a clear price estimate.
Step 4: Pipe Repair or Sectional Replacement
The compromised section (copper, PEX, or brass) is cut out. The plumber solders, crimps, or threads new commercial-grade piping and fittings securely.
Step 5: Pressure Testing & System Verification
The main supply is re-opened slowly. The plumber performs a hydrostatic pressure test to confirm that all repairs hold tight under full building pressure.
Step 6: Site Cleanup & Sanitization Guidance
Excess water is cleared from the immediate work zone, and advice is provided on structural drying, restoration, or pressure-reducing equipment.
Can You Fix It Yourself?
Knowing what steps to take yourself—and when DIY becomes dangerous—is critical during a major leak emergency.
Safe Immediate Actions for Property Owners:
-
Turn Off the Main Water Valve: Locate your main shut-off valve (usually near where the water service line enters through the basement wall or front utility closet) and turn the handle clockwise until tight.
-
Shut Off Electric Supply to Affected Areas: If water is leaking near outlets, appliances, or light fixtures, switch off the corresponding breakers at your electrical panel.
-
Open Lowest Faucets to Drain the System: Open basement or ground-floor sink taps to drain remaining water out of the pipes and reduce overhead ceiling pressure.
-
Soak Up Excess Water: Use towels, mops, or wet-vacs to reduce water absorption into wood floors and baseboards.
Dangerous Pitfalls to Avoid:
-
Do Not Wrap Burst Pipes in Tape for Long-Term Fixes: Rubber tape, hose clamps, or epoxy putties are temporary, short-term stopgaps that will burst under city pressure.
-
Never Solder Wet Lines: Attempting DIY torch soldering on lines containing residual water leads to failed solder joints and potential fire hazards inside wood wall frames.
-
Do Not Touch Electrical Panels in Wet Areas: Never step into standing water to reach an electrical breaker box. Contact your utility company or emergency services if water covers electrical systems.
Tools Professionals Use
Licensed emergency plumbers utilize modern diagnostic and repair equipment to fix major leaks quickly:
-
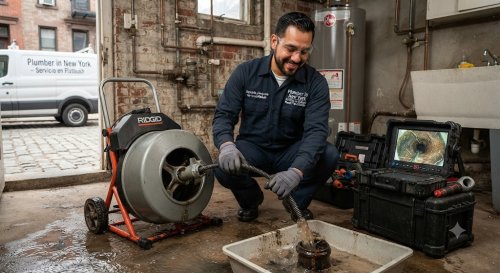
Acoustic Ground Microphones: Sensitive listening devices that pick up the sub-surface sound of pressurized water escaping underground or under concrete.
-
Thermal Imaging Cameras: Infrared scopes that track temperature variations behind walls and under floors to locate hidden leaks non-destructively.
-
Digital Pressure Gauges: High-precision instruments used to test system static pressure and identify micro-drops indicating hidden breaches.
-
Propress Electric Crimping Tools: Flame-free hydraulic pipe crimpers that join copper lines securely without open flame hazards in residential units.
How Long Does the Repair Usually Take?
Repair timelines depend on pipe accessibility, location, and the severity of the rupture:
| Repair Type | Scope of Work | Estimated Duration |
| Exposed Pipe Joint Repair | Cutting and replacing exposed copper/PEX under sinks or in utility closets | 1 to 2 Hours |
| In-Wall or Ceiling Leak Repair | Opening drywall, replacing damaged pipe section, and pressure testing | 2 to 4 Hours |
| Underground Service Line / Slab Leak | Acoustic locating, concrete breaking/excavation, and main line replacement | 1 to 2 Days |
Cost Factors
Water leak repair costs depend on job site conditions and technical requirements.
Key cost factors include:
-
Emergency & After-Hours Dispatch Fees: Priority service response during nights, weekends, or citywide freeze emergencies.
-
Diagnostic & Leak Location Equipment: Use of non-invasive thermal imaging or acoustic tracing tools.
-
Pipe Accessibility: Reaching pipes hidden behind concrete, tile, plaster, or beneath basement slabs versus exposed utility lines.
-
Pipe Material & Diameter: Commercial-grade copper, PEX, or heavy-gauge main supply materials.
-
Structural Demolition & Access: Opening drywall or removing floor tiles to access buried water lines.
-
Pressure Regulator Installation: Adding or replacing Pressure Reducing Valves (PRVs) to prevent future pipe ruptures.
Plumbing repair costs vary depending on the severity of the problem, accessibility, materials required, emergency service, property type, and local labor rates.
Hidden Truths Homeowners Should Know
-
Small Dripping Leaks Turn Into Catastrophic Ruptures: Pinhole leaks wear down surrounding metal wall thickness until the pipe splits completely under normal water pressure.
-
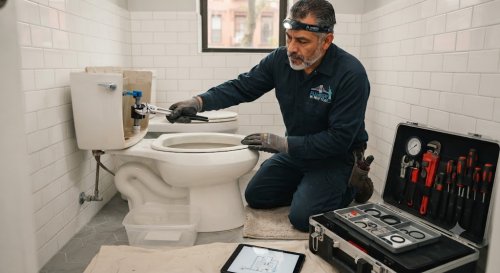
Cheap Rubber Flex Lines Have Expiration Dates: Braided flex hoses on toilets, ice makers, and sinks degrade after 5 to 7 years and should be replaced regularly.
-
Insurance May Deny Claims Caused by Neglect: Insurance providers frequently reject claims if evidence shows a leak was ongoing and ignored for weeks or months.
-
High Municipal Pressure Ruins Plumbing Fixtures: Water pressure exceeding 80 PSI wears out toilet fill valves, appliance solenoids, and pipe solder joints prematurely.
-
Hard Water Accelerates Metal Corrosion: Mineral-heavy water breaks down internal pipe coatings, leading to premature copper pinhole leaks.
-
DIY Tape Fixes Almost Always Fail: Emergency tape wraps are only meant to buy minutes while you locate the main valve, not to withstand continuous line pressure.
-
Annual Pressure Tests Prevent Sudden Floods: Checking your property's static water pressure once a year catches failing PRVs before pipes rupture.
15 Common Mistakes Homeowners Make
Avoid these frequent mistakes when dealing with plumbing lines and emergency water leaks:
-
Not knowing where the main water shut-off valve is located before an emergency occurs.
-
Leaving main water shut-off valves untouched for years until they seize up when needed.
-
Using temporary repair tape or epoxy putties as permanent fixes.
-
Ignoring minor wall discoloration, paint blistering, or musty basement smells.
-
Allowing indoor water pressure to run unchecked above 80 PSI without a pressure regulator.
-
Hiring unlicensed, uninsured handymen to repair pressurized supply pipes.
-
Forgetting to replace rubber washing machine hoses every 5 years.
-
Turning off the main valve without draining residual line pressure through lower taps.
-
Leaving unheated utility spaces uninsulated during freezing Queens winter months.
-
Storing heavy items on or hanging clothes hangers from exposed basement water pipes.
-
Attempting to solder copper pipes while water is still trickling through the joint.
-
Failing to clear standing water immediately, allowing mold to form within 24–48 hours.
-
Over-tightening pipe threads, which cracks plastic and brass fittings.
-
Overlooking main line water meters that continue ticking when all taps are closed.
-
Delaying emergency plumber calls while trying unproductive DIY solutions.
Maintenance Tips for Long Island City Property Owners
Keep your water supply system safe and prevent major leaks with these practical steps:
-
Test Your Main Water Valve Twice a Year: Turn the main valve off and back on annually to keep the handle moving freely.
-
Install a Pressure Reducing Valve (PRV): Ensure your home's water pressure stays safely between 45 and 65 PSI.
-
Upgrade to Stainless Steel Braided Hoses: Replace rubber supply lines on toilets, sinks, and laundry machines with durable braided stainless steel.
-
Insulate Pipes in Cold-Exposed Areas: Wrap water pipes passing through unheated basements, garages, or exterior walls with thick foam insulation.
-
Install Smart Water Leak Detectors: Place wireless moisture sensors near water heaters, washing machines, and under kitchen sinks for instant mobile alerts.
-
Check Water Meter for Hidden Leaks: Turn off all fixtures and check if your water meter's leak indicator dial is still moving.
-
Replace Water Heaters Older Than 10 Years: Replace aging water tanks before rust causes bottom seam ruptures.
-
Know Your Local Isolation Valves: Label individual shut-off valves under sinks, toilets, and behind washing machines for quick isolation.
-
Maintain Moderate Indoor Heat During Winter: Keep property heat set to at least 55°F (13°C) during freeze warnings, even when out of town.
-
Drain Outdoor Hose Bibs Before Winter: Shut off interior supply valves to hose spigots and drain remaining outdoor line water before cold weather sets in.
-
Inspect Exposed Copper Lines for Green Corrosion: Clean off green oxidation (verdigris) and have a plumber inspect thinning pipe walls.
-
Flush Water Heater Tanks Annually: Drain sediment out of hot water tanks to prevent bottom-plate corrosion and overheating.
-
Keep Electrical Hazards Top of Mind: Always disconnect power at the breaker panel if water enters light fixtures or outlets.
-
Avoid Hanging Items on Overhead Plumbing Pipes: Never rest storage boxes or hang heavy items on exposed basement supply lines.
-
Schedule Annual Plumbing Inspections: Have a licensed plumber inspect pressure levels, main shut-offs, and exposed supply lines every 12 months.
When Should You Call an Emergency Plumber?
Call an emergency plumber immediately if you encounter any of these situation types:
-
Uncontrolled water gushing from ceiling, walls, or subfloors that cannot be stopped at local shut-off valves.
-
A main service line or water meter pipe rupture flooding your basement or slab floor.
-
Frozen pipes that have split open and will flood your property once thawed.
-
Leaks spreading toward electrical outlets, lighting fixtures, or main circuit breaker panels.
-
Sudden, severe loss of total building water pressure paired with subterranean running water sounds.
Frequently Asked Questions
1. Where is my main water shut-off valve usually located in Long Island City?
In most LIC properties, the main shut-off valve is located in the basement or lowest floor along the front interior wall, right where the water pipe enters from the street meter. In high-rise condos, it is often in a utility closet near the hot water heater or behind an access panel.
2. What should I do first when a major water leak starts?
Immediately shut off the main water supply valve. Next, turn off electricity to affected rooms at the circuit breaker panel if water is near outlets, and open your lowest sink tap to relieve remaining line pressure.
3. Why did my copper pipe develop a pinhole leak suddenly?
Pinhole leaks in copper pipes are usually caused by long-term internal corrosion, high water pressure (above 80 PSI), aggressive water chemistry, or turbulent flow caused by improperly deburred pipe cuts during installation.
4. Can high water pressure cause pipes to burst?
Yes. Excessive water pressure puts continuous stress on pipe solder joints, flexible supply lines, and appliance valves. Without a properly functioning Pressure Reducing Valve (PRV), sudden pressure spikes can rupture weak points in the system.
5. How does a plumber locate leaks hidden behind drywall without breaking walls?
Licensed plumbers use non-invasive tools such as infrared thermal imaging cameras (which spot cold/warm moisture patterns behind surfaces) and acoustic leak detectors that listen for the frequency of leaking pressurized water.
6. Will my homeowners insurance cover damage from a burst pipe?
Most standard homeowners insurance policies cover sudden and accidental water damage caused by burst pipes. However, damage caused by gradual, unaddressed leaks or maintenance neglect may be excluded.
7. What is a Pressure Reducing Valve (PRV) and do I need one?
A PRV is a safety valve installed on your main water line that reduces high municipal water pressure down to a safe level (usually 50–60 PSI) for your home's internal fixtures and pipes.
8. How long does it take for mold to grow after a major water leak?
Mold spores can germinate and begin colonizing damp drywall, carpets, ceiling tiles, and wood framing within 24 to 48 hours of water exposure.
9. Why is my water meter running when all faucets are turned off?
If your water meter's leak indicator dial is spinning while no taps, toilets, or appliances are running, you have an active leak in your main supply line, underground pipe, or toilet fill valve.
10. How much does leak detection and repair cost?
Plumbing repair costs vary depending on the severity of the problem, accessibility, materials required, emergency service, property type, and local labor rates.
Voice Search Questions
-
"Who is the best emergency plumber for water leaks in Long Island City?"
-
"How do I turn off the main water valve in my NYC apartment?"
-
"Why is water leaking through my ceiling in Hunters Point Queens?"
-
"Who fixes burst copper pipes near Vernon Boulevard LIC?"
-
"How much does an emergency leak repair plumber cost in Queens?"
Why Choose Plumber in New York City?
When an active water leak threatens your property in Long Island City, rapid response and expert execution are vital. Plumber in New York City provides dependable, 24/7 emergency plumbing services throughout Queens and the greater NYC area.
-
Licensed & Insured NYC Plumbers: Fully certified technicians equipped to manage complex residential and commercial supply line emergencies in compliance with NYC DOB codes.
-
Rapid Emergency Dispatch: Fast arrival across Hunters Point, Dutch Kills, Queens Plaza, Sunnyside, Astoria, and nearby Queens neighborhoods.
-
Upfront & Transparent Estimates: Honest pricing explanations with zero hidden fees before work begins.
-
Non-Invasive Diagnostic Tools: Thermal cameras and acoustic detectors to locate leaks accurately without unnecessary wall demolition.
-
Quality Workmanship & Modern Materials: High-grade copper, PEX, and heavy-duty brass components for long-lasting, code-compliant repairs.
Don't let a major water leak destroy your building or flood your interior spaces. Contact Plumber in New York City right away for fast, professional emergency leak detection and repair in Long Island City.
The comprehensive guide for Emergency Plumber in Long Island City: What to Do About a Major Water Leak is complete.